View and Create Alert Rules
You can view and create alert rules in the DBCC. The system continuously monitors system events or resource usage and promptly notifies relevant personnel when anomalies occur.
Access the alert page
Make sure you are logged in to the DBCC:
http://<ip>:8080/
In the left navigation bar, click Alerts to enter the alert page.
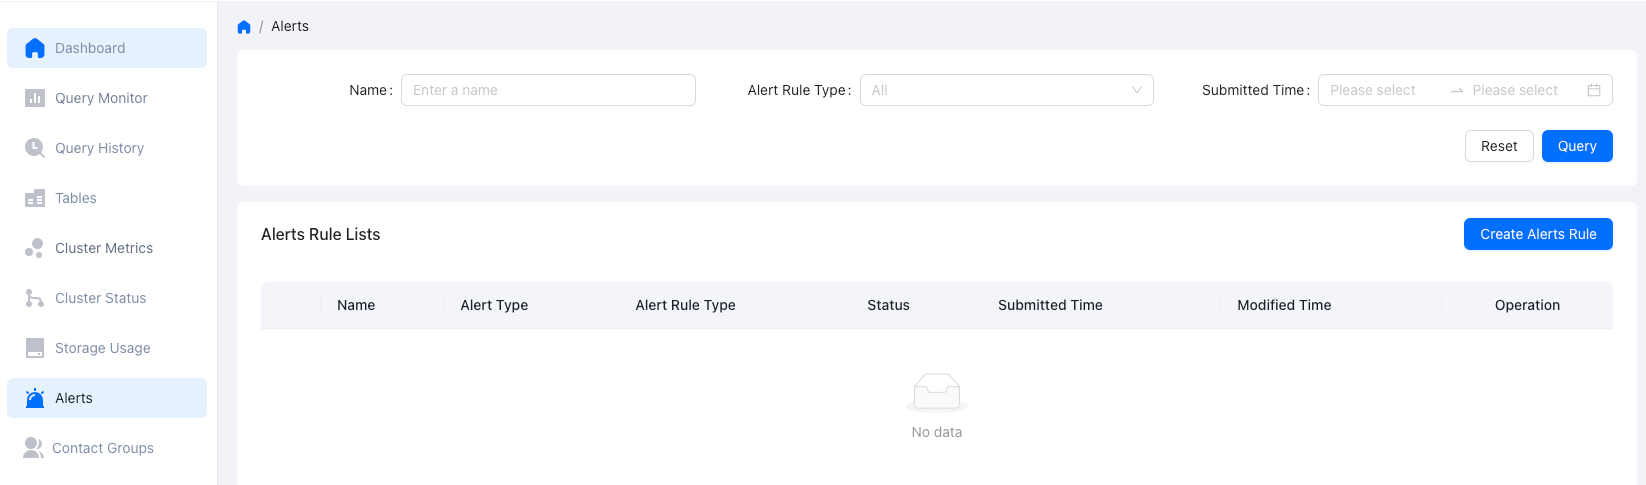
View existing alert rules
At the top of the page, search for target alert rules by name, rule type, or submitted time.
Create an alert rule
Click Create Alert Rule to open the rule creation page.
Fill in the basic information for the alert at the top of the page:
Name: Enter the name of the alert. This field is required.
Description: Optional. Use this field to describe the purpose of the alert.
It is recommended to use a name with business importance to simplify identification and management.
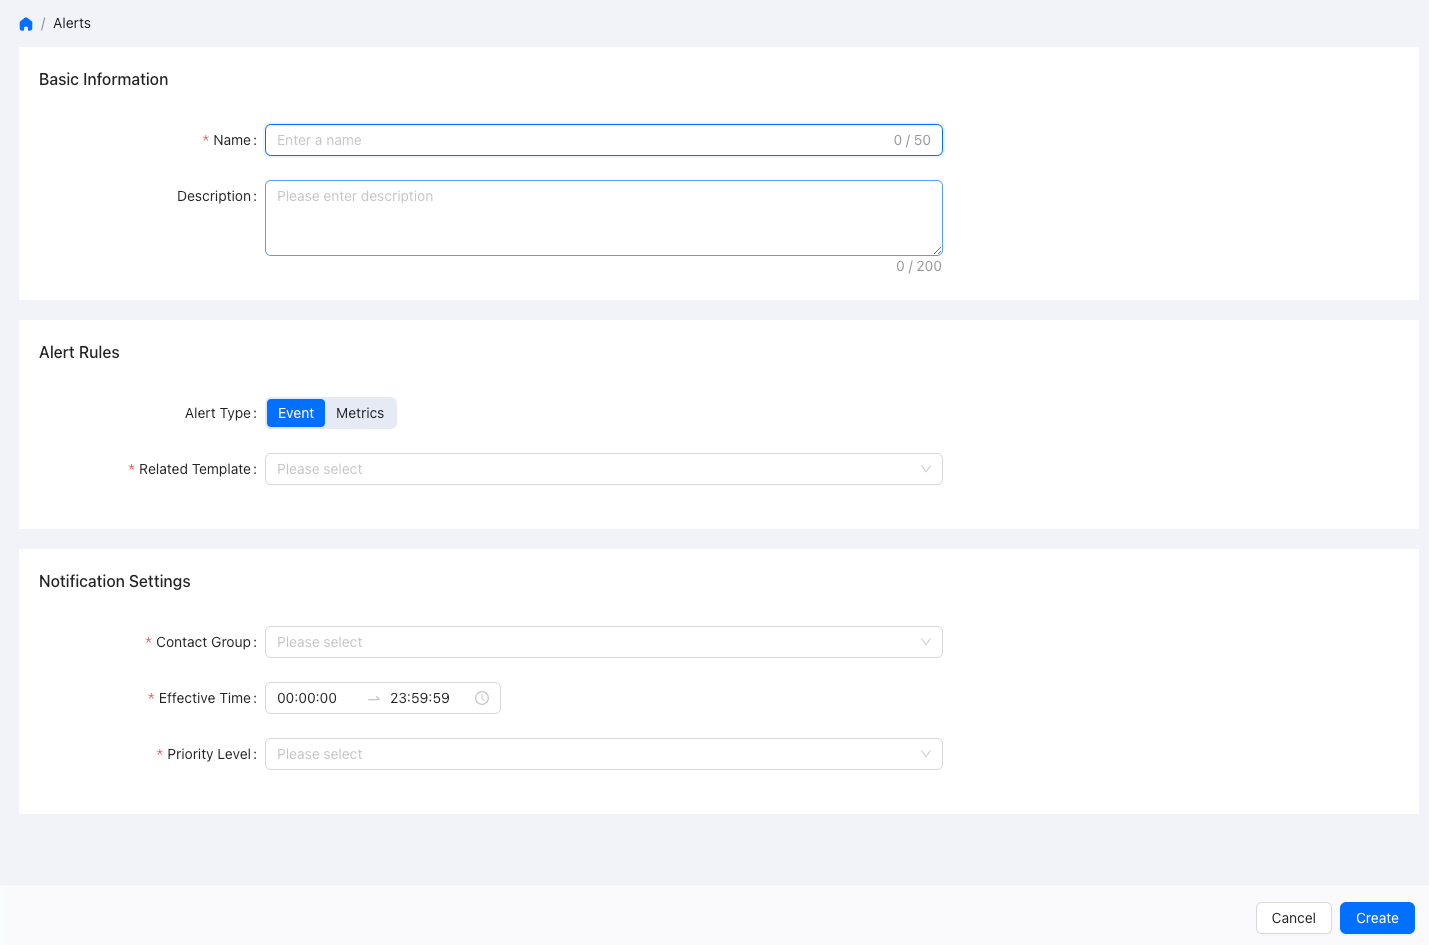
Select alert type
You can choose one of the following alert types:
Event: Detects specific system or database events.
Metrics: Monitors resource usage in the cluster.
Click the corresponding button to switch the type. The setting steps vary depending on the selected type.
Set alert rules
Set the trigger conditions based on the selected alert type.
If you select the “Event” type:
Choose Related Template from the dropdown list to select a predefined event template. The system triggers alerts based on the events defined in the template.
If you select the “Metrics” type:
Choose a Trigger Rule:
Related Template: Uses an existing policy template.Custom Template: Manually defines the alert policy.
(If you choose Related Template) Select the appropriate template from the dropdown list.
(If you choose Custom Template) Follow the on-screen instructions to define the alert policy.
Set notification policy
Specify who will receive alerts and under what conditions:
Contact Group: Select an existing contact group. This field is required.
Effective Time: Set the time range for notifications, such as all day (00:00:00 - 23:59:59).
Repetition Notification: Set how frequently the alert is sent.
Priority Level: Set the severity level of the alert.
Save the configuration
After confirming that the information is correct, click Create in the lower-right corner of the page to complete the alert configuration. To cancel the operation, click Cancel to return to the previous page.
When the alert is triggered, the system automatically sends notifications to the contact group based on your configuration, helping you detect potential issues in time.